Skip to content

Easy Guide: How to Check Battery Voltage with a Multimeter and Read the Results Correctly


What You Need Before Checking
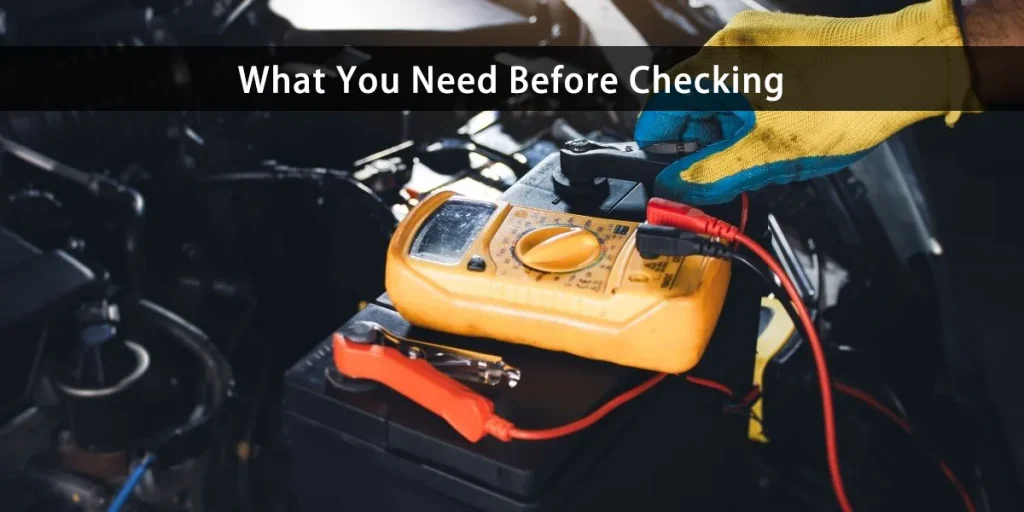
First: Digital or analog multimeter
The main tool you are going to need is a multimeter. Because a digital multimeter is easier to read and provides more accurate readings, most people prefer it. However, if you have an analog multimeter, it can still function well.
Second: Safety equipment
Although it is normally safe to check the voltage, batteries can occasionally discharge abruptly, cause sparks, or leak acid. It’s a good idea to wear safety glasses and gloves to protect yourself from accidents.
Third: A clean battery surface
Ensure the battery terminals are corrosion-free and clean before testing. The multimeter probes may be blocked by dirt or corrosion buildup, producing results that are not correct. Use a dry, non-conductive cloth to clean the terminals if needed.
Fourth: A consistent environment
Do the test in a well-ventilated, dry location. Steer clear of wet or rainy weather to lower the chance of electrical risks.
You can use a multimeter to safely and accurately check the voltage of your battery by getting these basics things ready.
How to Check Battery Voltage with a Multimeter: Step-by-Step guide
Using a multimeter to check battery voltage is simpler than most people realize. You may obtain an accurate reading in a matter of minutes if you have the proper equipment and carefully follow the instructions. Here are some simple procedures to follow:
- Select DC voltage on the multimeter.
DC (Direct Current) is used by the majority of batteries, including lithium and automobile batteries. If your multimeter has a manual range, select the range just above 12 volts (often 20V) after turning the dial to DC voltage (V⎓). - Find the battery terminals
Determine which terminals on your battery are positive (+) and negative (-). While the negative terminal is marked with a “-” sign, which is frequently black, the positive terminal is usually marked with a “+” sign and may have a red cover. - Connect the probes
Connect the positive (+) terminal to the red probe, then connect the negative (-) to the black probe. Inaccurate readings may result from a loose connection, so hold them securely to avoid slipping. - Check the multimeter’s screen for voltage
The multimeter will show the voltage level after the probes are attached. A 12V battery that is completely charged should read about 12.6 volts; a reading below 12.0 volts could mean the battery is weak. - Record the results
Especially if you’re keeping an eye on the battery over time, note the reading. It allows you to monitor if the voltage is decreasing too fast.
These procedures will help you easily and accurately check the voltage of your battery and decide whether it needs to be charged, maintained, or replaced.
How to Check Lithium Battery Voltage with a Multimeter?

- Prepare the multimeter
Select the DC voltage mode (V⎓) on your multimeter. Make sure you choose the right range because the majority of lithium batteries have higher efficiency. Select the 20V DC range, for instance, if you’re checking a 12V lithium battery. - Ensure the probes are connected in properly
The black probe should be placed on the negative terminal and the red probe on the positive. To avoid a loose reading, keep them securely in place. - Read the display
When completely charged, a good 12V lithium battery usually reads between 13.4 and 13.6 volts. A result below 12.0 volts could indicate that the battery is nearly dead or even damaged. - Check the manufacturer’s specifications
There may be minor variations in the “full” and “empty” voltage levels of various lithium battery types (such as Li-ion or LiFePO4). Always check your reading with the manufacturer’s suggested voltage range.
You can avoid over-discharge, increase battery life, and ensure that your systems or gadgets always have dependable power by learning how to check battery voltage with a multimeter on a lithium battery.
You can check this article for more insight high voltage battery systems
Interpreting the Voltage Reading
| 12.6V or higher (while lithium is 13.4 – 13.6V) | Fully Charged |
|---|---|
| 12.4 – 12.5V (while lithium is 12.8 – 13.2V) | Normal/Usable Range |
| 12.0 – 12.3V | Low / Needs Recharge |
| Below 12.0V | Bad / Discharged |
Common Mistakes to Avoid
Many people make small mistakes when learning how to check battery voltage with a multimeter, which can result in false readings or even damage the battery. You can save time and obtain a more accurate reading by being aware of these common mistakes.
- Incorrect multimeter setting: inaccurate readings will result from selecting AC voltage rather than DC voltage.
- Reversed probe connection: if you place the black probe on the positive terminal and the red probe on the negative, you will become confused and get negative results.
- Terminals that are corroded or dirty: false readings may result from improper contact with the probes caused by corrosion or dirt buildup. You may also check this article about battery corrosion.
- Unstable or fluctuating numbers can result from loosely placing the probes on the terminals.
- Testing while the device or engine is operating: when charging or under load, the voltage will appear higher, which is not the actual resting voltage.
- Ignoring manufacturer specifications: always double-check the recommended values because different batteries (such as lithium vs lead-acid) may have somewhat different voltage ranges.
Tips for Accurate Measurement and Safety Precautions

- Before testing, make sure the multimeter is set correctly to avoid inaccurate readings.
- To keep the probes from slipping, place the batteries on a level, stable area.
- To guarantee correct contact with the probes, remove any rust or dirt.
- Be motionless with the black probe on the negative (-) terminal and the red probe on the positive (+) terminal.
- Check the battery voltage when the device or engine is off and the battery is not charging for the most accurate readings.
- For protection from sparks or leaks, wear gloves and safety glasses, especially when inspecting vehicle’s battery.
- Before making any conclusions on the battery’s condition, take two or three readings to ensure consistency.
Conclusion
Understanding how to check battery voltage with a multimeter is a useful and easy technique to ensure the battery (whether it’s a lithium or lead-acid battery) stays in good condition. You may obtain accurate results in just a few of minutes if you have the proper equipment, follow the correct steps, and pay close attention to safety.
These voltage measurement findings help in identifying whether the battery is damaged, needs to be recharged, or is still in good condition. To make the procedure safer and more effective, it’s also critical to use safety advice and stay away of common mistakes.
In short, you can prolong the battery’s life, reduce repair costs, and guarantee that your car or electronic equipment are always ready to go when you need them by routinely checking the voltage.
FAQS
How much should a car battery read on a multimeter?
Around 12.6 volts or slightly higher when fully charged. If the reading drops below 12.4 volts, it usually means the battery is fully discharged.
What will a bad battery read on a multimeter?
A bad battery often shows below 12.0 volts at rest. In many cases, it may struggle to hold a charge even if you recharge it.
What voltage shows a bad battery?
Any reading under 11.8 volts commonly indicates a failing or bad battery. At this point, replacement is usually the best option, as recharging won't restore full capacity.